Total Pageviews

Monday 25 March 2013

WEAPON MODELLING: SHOTGUN HIGH / LOW POLY

      3 hours from start to finish, I've managed to develop a shotgun using two references two create a more unique weapon , rather than a bog standard shotgun. Personally, I absolutely love the results. Don't get me wrong, there were a few issues along the way, and it was a slog adding in all the supporting geometry. But in the end, even though there is still one graphical inconsistency (the bottom barrel thingy...), it doesn't matter, because it's only a minor detail. Thank god the hard part is over. Have a look at both versions below!

Oh, I haven't made the .GIF files yet, but I'm sure they'll screw up like they usually do...


COMMENTS AND CRITICISMS APPRECIATED!

WEAPON MODELLING - LOW POLY SHOTGUN
by Christian Whelan
WEAPON MODELLING - HIGH POLY SHOTGUN
by Christian Whelan
WEAPON MODELLING - COMPARISON .GIF
by Christian Whelan
WEAPON MODELLING - DETAILS COMPARISON
by Christian Whelan

       Ok, so maybe the .GIF images didn't screw up (makes a change). As you can probably tell, the majority of the turbo smoothing just gives the shotgun those nice lines and curves, but when the supporting topology is most present (the pump, the barrel and the trigger), you can really see the difference, and if successful, it will show when I bake the normal map to the low poly model.

     So that's it, it done. This time, I've made show there are no inconsistencies, and that I added in all the side specific details 'after' I added the symmetry modifier. The result, hopefully, is a model that will look good at all future stages, leaving me with a nicely modelled, mapped and textured weapon. 

It's a shame I didn't pay this must attention to detail on my first model!

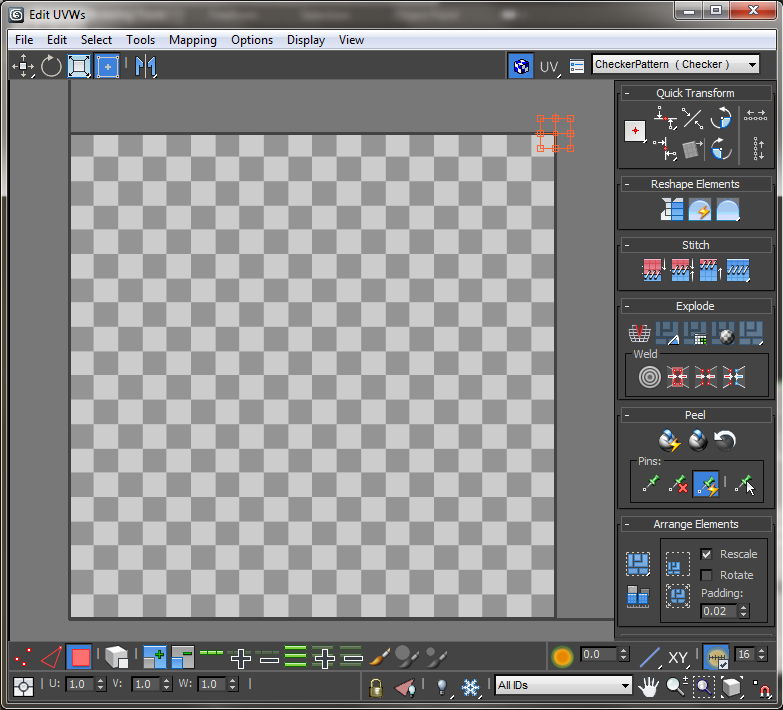
NEXT POST: WEAPON MODELLING - MAPPED MODEL / UV MAP

Sunday 24 March 2013

WEAPON MODELLING - MODELLING A NEW WEAPON

I have to start a new model, UV Map it, and bake it from scratch. Here's why.

       As much as I hated the idea, I 'have' to start a new model for the assignment. It's not just the fact that I had spent hours researching, designing and developing the model, it's that I actually loved my design - I was over the moon with my model. Unfortunately, after UV Mapping and baking it, I took it into university to receive some tutor feedback. If you look below, you can see that the weapon's stock doesn't smooth out as well as my tutor wants (I agree with him), additionally, being the stupid guy I am, I forgot to use symmetry early in the development  The smoothing issue was both mine an his fault, but the symmetry predicament is all down to me. 

WEAPON MODELLING - SMOOTHING ISSUES
by Christian Whelan
   
  I could continue with this weapon, texture it, add a specular map and present it, but these two issues will effect consistency in design, and the quality of the texture and specular map. So, rather than present a ugly looking model at the end (even though I spent a long time on it), my tutor feels its better for me to start a new and simpler model to continue the assignment - he advised I model a basic shotgun.

     The silver lining in this is that all the hardest parts are over, and my tutor likes the result. So he accepted my assault rifle model for this submission and is allowing my to continue on with a simple shotgun as if nothing happened. Which will one, turn out looking better and two, be easier to texture and present. 

     Not all is lost though, he says I can continue developing the assault rifle simultaneously if I feel strongly about it, and I will. By doing that, I'll have two weapons to hand in for the assignment, not just one. It's a win/win scenario on the most part. 

I'll start modelling the shotgun now.

NEXT POST: WEAPON MODELLING - SHOTGUN LOW / HIGH POLY

WEAPON MODELLING: NORMAL MAP

    After UV Mapping the model using Textools (an invaluable time saver - download link below), the model was ready for the next stage of development - baking using projections, a little tool called , to create normal maps.

TEXTOOLS - DOWNLOAD

    I started by ensuring that all the sections where attached and that the UV Map was efficiently spaced. From that point, I ensured that both the high poly and low poly model where positioned identically on the X, Y and Z axis so that eventually, the projection would be as accurate as possible. From this point. I named the models (to avoid confusion) and applied the projection modifier, edited the projection cage, modified the render to texture settings and saved the Normal Map (for baking). This is below.

    Before going ahead with the bake, I decided to do a little test render first, to ensure that the change wasn't causing any issues. As it turned out, it was, and by rendering the map at a low resolution, I had saved myself some time and hassle. With a little modification  of the push property, my Normal Map was fine when rendered at a higher quality (1024 x 1024). So, now I had my Normal Map to be baked onto the model (see below)


WEAPON MODELLING - NORMAL MAP
by Christian Whelan

NEXT POST: WEAPON MODELLING - MODELLING A NEW WEAPON

Sunday 17 March 2013

WEAPON MODELLING: WEAPON UV MAPPED

     Managed to get the issues fixed. Turned out it wasn't an issue, it was just me being an idiot. I hadn't ironed out the faces, hence the weird UV Mapping issues and absent checker textures. Anyway, I got it done, and hopefully there are no issues (no doubt there will be many). Now all I need to do is is bake the normal map onto the low poly. 

I had some issues with distortion and I ran into some issues with my topology, but I eventually got it done. Have a look below. I think it's looking okay.


WEAPON MODELLING - LOW POLY UV MAPPED
By Christian Whelan
WEAPON MODELLING - COMPARISON
by Christian Whelan

   To be honest, my weapon is so rigid that I don't really think the UV map will do that much visually. I suppose I'll just have to wait and see - I'm going to get the baking done now. Good job I wrote a blog on how to do it!

NEXT POST: WEAPON MODELLING - NORMAL MAP AND COMPLETE MAP

Saturday 16 March 2013

WEAPON MODELLING - TEXTOOL UV MAPPING ISSUES

      So I installed Textools into 3Ds Max and intended to get the UV Mapping and normal map baked within an hour. Unfortunately the issue with my disappearing faces that I thought I'd fixed previously, decided to make a surprise entrance again. I seriously have no idea what to do this time. 

When I apply the checker texture and edit the UV Map (using Textools), the object reverts to a dark grey colour and disappear on the UV Map (as you can see below)

WEAPON MODELLING - UV MAPPING ISSUES
WEAPON MAPPING - UV MAP ISSUES

I've tried this on several objects.The primitive shapes that make up parts of the weapon are fine, it's just the polygons I'd drawn in myself that are having the problems (the ones that make up 90% of the weapon). If someone could help me with this I'd greatly appreciate it.

I'll browse forums in blind hope for now. Hopefully, I'll get this problem fixed by Monday.

NEXT POST: COMING SOON!

WEAPON MODELLING: LOW POLY MODEL

          I overcome the hurdle I had yesterday. As it turns out, all I had to do was save the model as a 3Ds Max 2012 format. Unfortunately  that meant I needed the 2013 version only available in University for some strange reason.   

    Anyhow, after finishing the development of the high polygon model and tidying up its topology. I needed to take the high poly model, and remove the majority of its supporting topology to create the low polygon model. The reason for this is because the next stage of development is the UV Mapping and baking.

    Eventually I'll do this by projecting the maps of the high polygon model onto the low polygon model, to give the illusion that the low polygon model is in fact the highly detailed high polygon model. This is why I need both versions - to help with mapping, texturing and rendering.

    Now the cleaning of the topology was done, I deleted the supporting topology, ensuring that no vertices or edges crucial to the weapons base shape were removed. What was left (as shown below) is a weapon model with less tris and less detail, but a weapon that would run faster in an engine, saving processing space for more details in-game. The final Low Poly model is below.


ORIGINAL DESIGN - REFERENCE
by Christian Whelan
WEAPON MODELLING - LOW POLY
by Christian Whelan

All I need to do now is bake the high poly model to the low poly model. Then I can paint the texture and add the diffuse and specular maps.

NEXT POST: WEAPON MODELLING - TEXTOOL UV MAPPING ISSUES

WEAPON MODEL - ISSUES WITH 3DS MAX 2013

Unfortunately, I've ran into a speed bump with my model development. 

      At home, I use the 2012 version of 3Ds Max. At university, I use the 2013 version. The reason for this is because for some strange reason (especially now) 2013 will not install on my computer. It says it is already installed, even though it isn't anywhere to be found on my computer. The issue here, is that the model was last developed in university on the 2013 version of 3Ds Max, therefore  it is not compatible with the 2012 version.


     The only way I can use the model in the 2012 version of 3Ds Max is to convert the model into an OBJ file using the 2013 version. Obviously I don't and cannot have that. 


Development wont be possible until either Friday the 15th or Saturday the 14th. I'd have to get UV mapped in that day to hit the milestone hand-in on time.


NEXT POST: WEAPON MODELLING: LOW POLY MODEL


WEAPON MODELLING: MODEL PROGRESS 09/03/2013

         I took my seemingly finished high poly model to university for my tutor and it turned out that although it was a nice design, it's topology was a mess (as I suspected). A golden rule is to never have five sided polygons on your objects - it's a nightmare when it comes to smoothing, mapping and rendering. Stupidly, because I am forgetful, I thought five sided polygons where defined by there actual distinctive sides.... I was wrong. It turns out polygons are determined by their vertices. When this fact was realised, it turned out my weapon was made out of five sides polygons (oops...). To be honest, I thought it was hilarious haha Then I realised I had to spend the next three hours fixing the damn thing! 

Anyway I got it done and the slightly noticeable result is below.

WEAPON MODEL - HIGH POLY COMPLETE
by Christian Whelan

Now the model is done, it's time for the next stage - mapping, texturing and baking. My favourite part...

NEXT POST: WEAPON MODEL - ISSUES WITH 3DS MAX 2013

Sunday 3 March 2013

WEAPON MODELLING: MODEL PROGRESS 01/03/2013

         Well yesterday was my 21st birthday, so I didn't really make any progress on my model, thankfully I'd already made some good progress on it the night before. Anyway, the fun is over now, so I sat at my laptop for a good hour adding in the supporting geometry until my laptop decided to commit suicide and corrupt the single and only version of the model... brilliant - two weeks of work gone.

   By some miracle of good luck, it turns out 3Ds Max 2012 has a Auto Back-Up feature. So just when all seemed lost, I managed to open to most recent backup found and re save my file 4 times in 4 separate places. It's set me back a good couple of hours but at least not all was lost. I won't be making that mistake again.

     Anyhow, I made a clone of the gun, added in the supporting geometry (not an easy task when you have an object full of hidden tris and 3 sides faces) and applied the turbo smooth to each of the sections. However it turned out I forgot to add in two huge details - the pull back bullet gun thing (on the side) on the rivets that give the gun some depth.

It turned out great I think! Have a look.


COMMENTS AND CRITICISMS APPRECIATED!

|WEAPON MODELLING - ORIGINAL CONCEPT
by Christian Whelan
WEAPON MODELLING - MODEL TURN-AROUND (HIGH POLY)
by Christian Whelan

    It didn't come without a few issues. The more complex sections of the weapon were a real struggle when it came to adding in loops and cuts. In fact, I'm still unsure whether or not my topology is at a high standard. It seems messy in some parts, or maybe that's just me. After all, I've been staring at it for a good few hours now. 

Anyhow, I added in all detail that give the weapon it's 'character' and depth. The GIF below shows these and when I finally polished out the imperfections (which I'll be made aware of on Monday) I'll be able to map and texture it. Can't wait...


WEAPON MODELLING - MODEL DETAILS
by Christian Whelan

NEXT POST: WEAPON MODELLING: MODEL PROGRESS 09/03/2013

Saturday 2 March 2013

WEAPON MODELLING: MODEL PROGRESS 27/02/2013

        So I finally got the basic low poly model completed. There are a few details here and there that I still need to polish out, but so far, I'm fairly happy with the results. The parts that need polishing? The grip is bothering me a bit, (I cant put my finger on it) and the barrel area of the gun isn't connected and has confusing topology.

     Of course, I've only modelled half of the weapon - the aim is to UV Map one side and mirror it . The issue is, on the multiple occasions I've done this, the edges just don't match up no matter what I try. Because of this, light bleeds through the gap or clipping occurs, leaving in it's place an ugly render. This will only look worse when I UV Map it, so I need to sort this out pronto.

WEAPON MODELLING: ORIGINAL CONCEPT
by Christian WHelan
WEAPON MODELLING: LOW POLY TURN AROUND - IN PROGRESS
by Christian Whelan

So, all I need to do now is polish it up, add in any more detail I think it could use and then finally, add in the supporting geometry so I can Turbo-smooth like a madman, leaving a sexy weapon in it's place!

NEXT POST: WEAPON MODELLING: MODEL PROGRESS 01/03/2013