Total Pageviews

Tuesday 26 February 2013

WEAPON MODELLING: MODEL PROGRESS 26/02/2013

      I racked my brains to understand why exactly the rendering and Graphite Modelling Tools had a grudge against me causing those crippling issues. Eventually, I figured it out... hopefully.

      The clear problem, was that only one side of the face was editable and rendering without applying a two faced material. So I had a look around the modifiers and found the Normals modifier. I applied it and checked the "Flip Normals" and "Unify Normals" and collapsed the modifiers. Instantly, the colour issues were gone and the Graphite Modelling Tools actually had worked. Thank god! It took me half a day but I got there. Unfortunately, my goal to get this model done within two days has well and truly gone down the drain, made it's way to the Atlantic, sunk to the abyss and been violently murdered by a shark. Brilliant...

    Anyway, the progress is below. I altered the shoulder rest to fit with the original concept (it was too straight) and added in the middle layer of the barrel and body of the gun (the same object). 

Note: I did save the model with these modifications as a separate copy... I don't want to shoot myself in the foot.

COMMENTS AND CRITICISMS APPRECIATED!

WEAPON MODELLING - ORIGINAL CONCEPT
by Christian Whelan
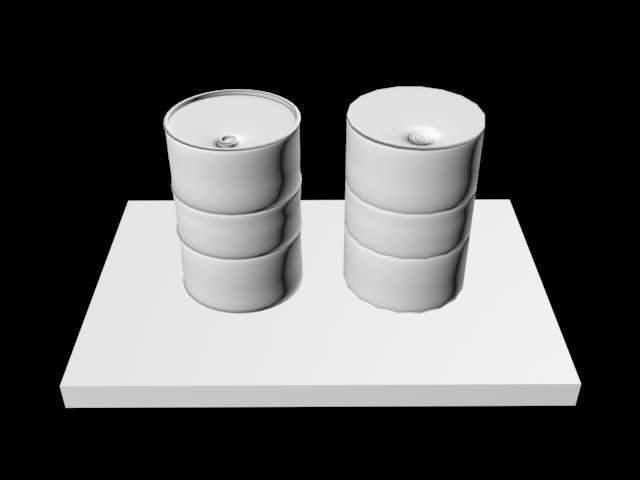
WEAPON MODELLING - MODEL PROGRESS
by Christian Whelan

      Besides the trigger, grip and clip, the model hasn't much detail. This is completely down to the issues I faced preventing me from adding the detail you can see in the original concept. It's looking pretty faithful at the moment. From here, I'll add in the ribs into the shoulder rest grip and the detail into the stock (which will be fun...).

NEXT POST: WEAPON MODELLING: WEAPON PROGRESS 27/02/2013

WEAPON MODELLING: ISSUES WITH DEVELOPMENT

        I've been cracking on with the weapon model as I said I would, but the rendering issue I had with the disappearing faces has began to latch itself onto every object I create. Initially, I thought I had fixed the problem by applying a material that projects both sides of the faces. Although this did solve the rendering problems, the objects still adopt a different colour. The main concern however, is that the Graphite Modelling Tools no longer work on these objects, regardless of whether the material has been applied.

    I have absolutely no idea why this is. I've looked online for solutions and attempted them all, but none seem to work. This wouldn't be so bad if the weapon I had designed hadn't been so complicated. Sections such as the stock, the shoulder grip and many more to be developed require these tools. You can see what I mean when I compare the design and the in-progress model.

WEAPON MODELLING: WEAPON CONCEPT
by Christian Whelan
WEAPON MODELLING - MODEL PROBLEMS
  
     It looks like in-engine lighting, but it's actually the sections that have a different colour. The grip, the trigger, the stock and the shoulder grip all share the same problem, and considering these are the defining parts of the weapon, I find myself at a stalemate. I'd carry on developing the other section if I didn't think it might pose some issues when it came to baking and rendering.

If anyone has had the same issue and could help I'd be grateful.

NEXT POST: WEAPON MODELLING: MODEL PROGRESS 26/02/2013

WEAPON MODELLING: MODEL PROGRESS 25/02/2013

      The progress I had made on the weapon model turned out to be nothing more than practice when I went into University to find the file was glitch ridden. Two and a half hours later, and even an attempt at fixing the file by my tutor, I finally found the problem - a random piece of topology far in the infinity space. 

With no development progress today, I've set myself the task of getting the model finished within the next two days. However, I neglected to remember that my home copy of 3Ds Max was the 2012 version, not the 2013 version. So, the little glitch ridden progress that was made, was incompatible - I had to start a fresh. My progress is below.

COMMENTS AND CRITICISMS APPRECIATED!

WEAPON MODEL - REFERENCE IMAGE
by Christian Whelan
WEAPON MODEL - PROGRESS
by Christian Whelan
WEAPON MODEL - PROGRESS
by Christian Whelan

      It's turning out really well so far, but there are a couple of things troubling me. Firstly, the largest section of the grip is a darker colour than the rest, regardless of the objects properties. In an attempt to see if it was a refresh problem, I rendered it, highlighting a problem I am dumbfounded by - the main faces of both the grip and the trigger seem to disappear entirely. I hope to god I don't have to do them again!

WEAPON MODEL - RENDER GLITCH

    My second issue is figuring out how to model the individual insets where the rivets or screws would lie. It's an important detail that would stop the weapon looking plain and would enhance the normal and diffuse maps effectiveness  If I can't do it (which I'm sure there's a way to) then maybe I could use specular maps later in development to create the illusion?

I guess I just need to plod on developing this weapon, I'll fix it these two issues later, it's not that hard to model when using the create tool in co-operation with the in-environment reference image.

NEXT POST: WEAPON MODELLING: ISSUES WITH DEVELOPMENT

Monday 18 February 2013

WEAPON MODELLING: MODEL PROGRESS 18/02/2013

      I got the go ahead from my tutor to start modelling my final concept for my weapon design. So I spent the last 2 hours working my head around 3Ds Max's interface again (UDK has brainwashed me). I've not made much progress to be honest, but its a start and I learnt a neat new trick today that is a miracle time saver.

The reference image and in progress model are below.

WEAPON MODEL - REFERENCE
WEAPON MODEL - ORTHOGRAPHIC VIEW
by Christian Whelan
WEAPON MODEL - PERSPECTIVE VIEW
by Christian Whelan

      I started by importing my final concept design image onto a primitive box as a constant working reference when modelling. From that point, I could begin building up the indidivudal parts of the weapon using the "Create" tool, not worrying too much about both sides of the weapon - Mirroring can fix that later. So far, I've only got one section of the weapon's grip complete.

By creating a primitive box, converting it to an editable poly, then deleting the faces, I had a virtual space to work on and edit. Using the "Create" tool, I could literally cut in the shape I wanted. It was important I did this in the orthographic view, as to ensure the perspective wasnt scewed, and therefore the proportions. From this basic shape, I can cut in the edge faces (to keep topology), used the inset tool (to create and movable border), the extrude tool (to create more faces) and the move tool (to specificly edit the topology). The result was the grip below.

I just need to repeat this process over and over to get the weapons individual parts modelled. From that point, I would then mirror the entire weapon and finish modelling the side specific features

NEXT POST: WEAPON MODELLING: MODEL PROGRESS 25/02/2013


Sunday 17 February 2013

WEAPON MODELLING: WEAPON DESIGN TURN-AROUND

      All the research and planning has been completed  I gained an understanding of weapons, a deeper understanding of Assault Rifles and a developed knowledge of visual styles. From that. I brainstormed inspired and creative ideas for weaponry, of which I developed into initial concepts, until finally, refining 'one' into a final design of which will be taken forward to be developed in 3Ds Max Studio. 

The final turn-around design is below.

COMMENTS AND CRITICISMS APPRECIATED!

WEAPON MODELLING - FINAL WEAPON TURN-AROUND
by Christian Whelan

        Granted, it's going to be a serious challenge modelling this. I'll need a basic version of this sheet (block colours) for reference when developing the individual modules of this weapon. Besides this yet again ambitious idea, I love the design. It's everything I was aiming for and more. I think the shape is interesting yet believable, but what makes this weapon is it's texture. Leaning Specular Mapping techniques has prompted and will eventually facilitated this design (with the scratches and all) and hopefully, it will turn out as bold and effective as it has done here.
Fingers Crossed! I start modelling in a couple of days.

NEXT POST: WEAPON MODELLING: MODEL PROGRESS

WEAPON MODELLING: WEAPON CONCEPTS

       Looking at the silhouette designs I had completed, I chose 4 of the silhouettes to take further into this design      process. With these four basic silhouettes, I began to add in the detail to come up with a few designs. It's important to note that the three right hand designs originate from the same silhouette - I like that one (obviously...). Have a look at them below!

COMMENTS AND CRITICISMS APPRECIATED!

WEAPON MODELLING - WEAPON CONCEPTS
by Christian Whelan
WEAPON MODELLING - WEAPON CONCEPTS (COLOUR)
by Christian Whelan


       To develop these ideas, I obviously started with the silhouette. From this point on, before I designed anything, I looked at the research and reference material, took parts of real weapons and stitched them together in a creative way. The idea, was to design a selection of different weapons with a futuristic theme. I think I succeed in this goal.

However, what's important, and what I'm proud of, is that these weapons don't just seem like doodles for the sake of doodling. They look like they actually work - like they contain informed design choices. This is without a doubt because of the research and referencing that went into developing the individual aspects of each of these weapons.

My favourites? The top left and the middle two. They're consistent, they're effective and they're believable. I tried my best to design each of the weapons as if they fit together in clear, concise modules - I wanted the weapons to be clinical in shape. As for the colour scheme, well, for some strange reason, my unconscious seems to have an obsession with colours black and red. It looks great, don't get me wrong, but I'm going to have to break this mould if I am to improve when designing anything.

I still don't know which weapon or weapon aspect to take forward into the final turn around design. Maybe I'll take the middle left forward and incorporate aspects of the middle left. But then again, I love the middle right design in general, it's just that I prefer the shape of the middle left and the idea of the top left. It's going to be hard. Maybe I'll ask the opinion of others first.

NEXT POST: WEAPON MODELLING: WEAPON DESIGN TURN-AROUND

Saturday 16 February 2013

WEAPON MODELLING: ASSAULT / HEAVY MACHINE GUN RESEARCH

        Although I had a few favourite handgun weapon designs from the basic silhouette sheet, the assault rifles appealed to me more. Not only where the designs better, but there's more creative freedom with the complex shapes and varieties of the common assault rifle. However, I noticed that a lot of my assault rifle designs where 'heavy looking'. Considering this, researching the heavy machine gun could also be beneficial to my final designs. Therefore, in an attempt to understand the Assault Rifle and Heavy Machine Gun further, I have developed a research sheet to act as a learning and referencing tool.


WEAPON MODELLING - RESEARCH SHEET
by Christian Whelan
     
       Not only has this sheet given me further ideas about the weapon I shall design, but it's let me understand how weapons actually work and why they are designed the way they are. This is important, as a weapon shouldn't just look cool for the sake of looking cool, it should also be practical, ergonomic and at least look in some sense functional.

Now that I have researched, analysed and brainstormed weapons. It's time for the designing and planning to begin. Hopefully, within the week, I should have started development on my as of yet, none existent weapon design.

NEXT POST: WEAPON MODELLING: WEAPON CONCEPTS

Friday 15 February 2013

WEAPON MODELLING: WEAPON SILHOUETTES

       Before I even start to design any weapons in detail, I wanted to brainstorms lots of basic silhouettes. To me, it's the most important part of designing anything like this. Blocking out basic shapes lets me fill in the gaps with my imagination - over thinking things can be detrimental to initial designs (I personally believe). From these basic designs, I could then start to worry about the specific details that make a weapon an assault rifle, shotgun, handgun and so on. 

    I spent the last 45 minutes developing the below silhouettes with hardly any attention to detail. Anything was acceptable, and by following this method, I ended up with a large variety of weapon ideas - some bad, some good. With this database of ideas, I can and may mix and match aspects for the final weapon design, but for now, just learning what works and what doesn't is a great tool to find my personal design direction.


WEAPON MODELLING - WEAPON SILHOUETTES
by Christian Whelan

     Some weapons look realistic, some look conceptual and some look futuristic, but they all have definite potential to be categorised and developed. So which are my favourites?

     Well, it's hard to point them out, but a lot of the circular inspired weapons (futuristic weapons) I love. Rather than go through them all, I love most of the pistol and assault rifle designs. Which surprised me, as the idea of a pistol sounded monotonous. However, there is one design in here I'm passionate about and may have already chosen to be the basis of this assignment - the large heavy weapon. The one with the three circular trigger holes. To me, this one is simple, yet incredibly interesting. It really stands out a from the rest!

  However, although a difficult task, I shall choose a few of these designs and start to add in the individual details and maybe some basic colours before I choose the final weapon to take to the concept and development stages.

NEXT POST: WEAPON MODELLING: ASSAULT / HEAVY MACHINE GUN RESEARCH

WEAPON MODELLING: VISUAL STYLES RESEARCH

      Now I have an understanding of the different types of weapons, their individual features and a choice of weapons to choose from for my assignment, I needed to look at how other developers have designed unique but recognisable weapons using templates of modern weapons, but utilising specific styles. To do this I looked at the weapons of four different games;

Halo 4, Brink, Gears of War and Mass Effect.

All of these games have incredibly creative weapons and therefore each of them have lessons to offer when it comes to designing my own weapon. Take a look at the "Styles Research Sheet" below.

WEAPON MODELLING - VISUAL STYLES RESEARCH
by Christian Whelan

      This sheet has been incredibly useful. Just from looking at four games and studying their worlds weaponry, I have not only began to understand how to take a modern day weapon as reference and create something unique but recognisable, but I've also generated countless ideas that I will make sure to utilise in my weapon design(s). Now, I just need to get these ideas onto paper.

I'll do this through basic silhouette designs.

NEXT POST: WEAPON MODELLING: WEAPON SILHOUETTES

WEAPON MODELLING: WEAPON MOODBOARD

      The last large 3D Modelling assignment of the year is here - it is huge! I've had experience in 3D modelling, I've had experience in texturing and finally, I've had 'some' experience in mapping. The final assignment tasks us with applying all of this knowledge to a first person shooter gun that we have have to research, concept, model, texture, map and render. It's the full development process of any in-game object. So, I've made a plan of how to get this done in an organised fashion. Hopefully, this also means a credible and successful fashion.

1. Moodboards – Weapons
2. Visual Styles Research
3. Silhouettes Sheets
4. Moodboard – Chosen Weapon
5. Research Sheet(s)
6. Design Sheet
7. Turn-Around
8. Development Sheet
9. Low Poly Sheet
10. High Poly Sheet
11. Real Time Render of Textured Model
12. Texture Set Sheet
13. Final Real Time Render

    Again, I'm being ambitious, and it will stress me out beyond belief. But I'll get it done, hopefully. I've already got the first sheet done in an attempt to understand firearms a bit better visually. Now I have this reference sheet, It's time to look at different visuals styles and begin to brainstorm weapon ideas with this research in mind.

GUN MODELLING - WEAPON MOODBOARD
by Christian Whelan

    I'm still slightly torn on what weapon type to go for. Do I go for a weapon I want that is less interesting as an object? Or do I go for something I don't that has more complex geometry. Once I decide on the weapon, I'll complete the second sheet - a moodboard / reference sheet for that weapon type. Only then, can I really get started on this assignment.

NEXT POST: WEAPON MODELLING: VISUAL STYLES RESEARCH

3DS MAX: OIL BARREL SPECULAR MAPPING

        Previously, I had modelled and baked an Oil Barrel as a first attempt at normal and difuse mapping. To take it to the next level, we had our first attempt at using Specular Maps to add texture and depth. When an Oil Barrel in a game looks complex, but it's actually flat, uninteresting object, that's normal mapping and diffuse mapping. When the lighting bounces of the even the tiny scratches on that barrel, but again, it's still just a flat, geometrically uninteresting object, that Specular Mapping. 

     Using all these mapping technique in cooperation, developers can make a basic primitive barrel shape look like a dented, rusted and scratched oil barrel. What does this do? Well, it saves processing power for those more important in-game details whilst just simply making the game look believable for the player. I had my first attempt at this technique, the before, after and maps are below.

COMMENTS AND CRITICISMS APPRECIATED!

THE BARREL - THE MAPPING PROCESS
by Christian Whelan
THE MAPS - THE MAPPING PROCESS
by Christian Whelan
   
  It's hard to tell the difference between the two maps on the second GIF, but at its basics, I took the original Diffuse Map and overlaid a textured using an Ndo extension. This allowed me to convert the image and tweak the extensions various effect. If I wanted the scratched texture to be more bold, I could of done so, but as you can see from the before and after GIF of the barrel, it was effective enough.

NEXT POST: WEAPON MODELLING: WEAPON MOODBOARD

3DS MAX: OIL BARREL BAKING ATTEMPT

     Low Poly to High Poly baking is a magic trick that uses Normal Maps to save processing power so that your game can run faster. That Call of Duty gun looks great, but in reality, it really isn't 'that' great - its just a projected illusion. I had my first tutorial and attempt at baking today and to put it lightly, its not the easiest thing I've done.

My test subject? An Oil Barrel I had to model and bake myself. The result and normal map is below.

COMMENTS AND CRITICISMS APPRECIATED!

LOW POLY (RIGHT) - HIGH POLY (LEFT)
NORMAL MAPPING - by Christian Whelan
NORMAL MAP - OIL BARREL
by Christian Whelan

     So, to get the High Poly (left) looking like the Low Poly model (Right), I had to go through a few steps. Tehse steps take place after you have applied the Turbosmooth modifier.

1. Duplicate the High Poly model and remove all additional loops and verts.
2. Unwrap the Low Poly model's UV.
3. Once at its most basic, reset the xForm on the Low Poly Model.
4. In the modifier tab, collapse the xForm modifier and click 'Yes'.
5. Name the High Poly and Low Poly models appropriate names
6. Set the co-ordinates of the X, Y and Z axis for both barrels to '0.
7. Select the Low Poly model and press '0' to bring up the "Render to Texture" window.
8. Alter the Projection cage so that the High Poyl model fits snug.
9. Enable 'Projection Mapping', click 'Pick' choose the High Poly Model.
10. Go into the settings and click on the 'Global Supersampler' setup.
11. Enable the Global Supersampler and select the 'Max 2.5 Star' setting.
12. In the 'Mapping Co-ordinates' section enable 'Existing Channel' and set the '1'.
13. Enable the 'Selected Element Common Settings'.
14. Set the resolution to "1024x1024".
15. In the Output section, 'Add' a Normals Map.
16. In the 'Selected Element Common Settings', click the ellipsis next to the 'File name and Type' and save it.

       Now that the map had been created and saved, it was time to map it to the Low Poly Model using the 'Compact Material Editor'. Once this was done, the above image was the result. It looked good, but not great. Maybe this was down to the original High Poly barrel not being as geometrically interesting as it could of been, I guess I'll only know when I use this technique on more complex models. 

The fact is, it wouldn't look any good in a game. This is down to one thing - it looks to flat. I need some texturing and depth on the model to make it look 'realistic'. 

NEXT POST: 3DS MAX: OIL BARREL SPECULAR MAPPING